


by Clark Shelton, Editor
Look there is nothing better than a hot June or July Day, sitting under the trees hand crankin’ ice cream.
Ok, that’s a lie. It was the bane of my existence as a child. The constant turning. The times when the drum would stick almost dumping all your hard work over. Watered down rock salt all over your feet. Dad yelling you aren’t crankin’ fast enough.
Now, I know there are electric thingamajiggers out there now that will do all of the work for you. But, it won’t hurt the grandkids y’all to turn a crank and understand the “old way” of doin’ things.
So from the folks at pickyourown.org here are the steps to make that great ice cream using an electric or hand cranked ice cream machine ( those with fancy schmancy gel freezers and such, there are different steps you can find here)
Ingredients
- 2 cups whole milk
- 1 cup sugar
- 1/4 cup fat-free powdered milk
- 8 eggs (yolks only needed)
- 1 cup heavy whipping cream (OR half-and-half OR light cream for lighter more ice cream, more like gelato)
- 1 teaspoon vanilla extract
- 3 cups of prepared fruit (strawberries, peaches,
raspberries, mangoes, or whatever you have! See step 7 for details.
Equipment
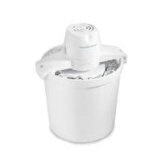
- 1 ice cream maker
- 2 small bags
- 2 cups (500 ml) table salt
- 1 large pot
- 1 wooden or plastic spatula
Instructions
Step 1 – Be sure you have plenty of ice and salt
There’s not much point in trying to make ice cream if you need ice for the ice cream maker. For a typical 2-quart ice cream maker, you will need approximately: 2 cups (500 ml) table salt and 8 trays of ice cubes. It is NOT NECESSARY to use rock salt or crushed ice in most units (certainly not the Oster’s).
Step 2 – Heat the milk, sugar and powdered milk
 In a large pot ( 4 quarts or larger) with a heavy bottom (for even heat distribution), mix the milk, sugar and powdered milk. Bring the mix to a low simmer over medium heat and stir to dissolve the sugar, then turn the heat down and just keep it warm.
Step 3 – Separate 8 egg yolks
Separate egg yolks from 8 large eggs. Just crack the eggs against the edge of the bowl and either pour them from one half of the shell to the other, or use your fingers to let the whites drop through while holding the yolk.
Step 4 – Whip the egg yolks until thickened
Put the egg yolks in a medium bowl and whisk until they are thickened (it only takes about 2 minutes. I use a hand mixer on low speed.
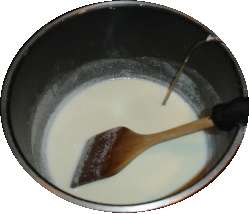
Step 5 – Slowly add 1 cup of the hot milk mixture to the egg yolks
While constantly whisking, slowly add 1 cup of the hot milk mixture and whisk until it is blended (a few seconds).
Step 6 – Pour the egg yolk mix into the pot of hot milk
Then pour the egg mixture back into the pot of hot milk and increase heat to medium. Stir the mixture constantly with a wooden or plastic spoon, until the mixture is thickened (like gravy) and registers between 170 F and 180 F (check with an instant-read thermometer, like the ones with a probe).
Step 7 – Add the light cream and vanilla and refrigerate
Stir in light cream (or half-and-half)and vanilla. Cover and pop into the refrigerator for at least 6 hours before continuing on to step 8. Overnight or even 24 to 48 hours is fine.
Step 8 – Prepare the strawberries
You get best flavor if you puree the strawberries first in your food processor or blender. And besides strawberries, your could use raspberries, blueberries, blackberries, mangoes, figs and peaches.
Thawed frozen strawberries work well also.
To use the fruit just prepare it as you would for eating, then blend it in your food processor or blender for a few minutes. Here are some tips:
- Strawberries: remove the cap (the green parts)
- Peaches and nectarines: remove skins, pits and bruised
- Raspberries: just wash them
- Blueberrikes: just wash them and pick off any remaining stems.
- Blackberries: I like seedless, so I wash them and then run them through a Foley Food Mill to remove the seeds!
- Figs: Remove stems and bruises
- Mangoes: Peel, and cut the flesh off the stone.
Step 9 – Mix the milk/cream mix with the fruit and put the canister in the ice cream maker
About 45 minutes before you want to serve the ice cream, stir the milk/cream mixture together with the pureed fruit. Stir it up well. Pour the milk/cream/fruit mixture from step 8 into the metal freezer canister and put the cover on the canister. Put the canister in the cream maker. Layer ice and salt solution as follows:
A. Pour 1 cup (250 ml) cold water into Ice Bucket.
B. Place a 1 inch (2.5 cm) layer of ice cubes around Cream Canister in Ice Bucket.
(Hint: the ice cream canister should stand straight while layering.)C. Sprinkle 1/3 cup (75 ml) table salt or 1/4 cup (50 ml) Kosher (coarse)
salt on ice.
D. Continue layering ice and salt to the top of the Ice Bucket.
E. Pour 1 cup (250 ml) cold water over top ice layer.
Step 10 – Add the salt and ice and turn on the ice cream maker! (or holler at the kids)
Turn the ice cream maker on (or start cranking) and let the maker work until it is thickened about 20 to 25 minutes. From time to time, add more ice cubes and salt as needed. Now is the time to add the chocolate syrup, if you are making chocolate ice cream. I add about 1/2 cup of chocolate syrup – I use the Hersey’s sugar free syrup, but both the variety and amount are a matter of personal taste preferences!
You can tell when the ice cream is done, by simply checking the consistency through the opening on the top of the ice cream maker. You will also hear the motor straining, as the ice cream freezes. On some units, the directions with the maker tell you to let it work until the motor stalls and stops.
When it is done, the ice cream should have a soft, creamy texture. If you want firmer, harder ice cream, transfer the ice cream to an airtight container and place it in freezer for about 2 hours. Remove from freezer about 15 minutes before serving.
Step 11 – Enjoy!
Hey, once it reaches the consistency you like, it’s time to eat! That’s it! You made great homemade ice cream!


